

The new swarm section of the simulated universe is out, and it’s a permanent mode. We can get about 4,500 Stella Jays from clearing everything, but don’t worry; it’s not time-limited, so no need to rush. There’s a bunch of powers and buffs to unlock, which is overwhelming at first. You will eventually unlock everything just by playing this mode over and over again, though.
But you’re not here for that; you want to know some cheese or strong strategies to clear this early. Even though the Swarm bug bosses are quite strong, we’ve got some equally strong combos to counter back. There is one problem: not everything is unlocked at the start, so we do need to get a couple of clears on the lower difficulties to open everything up.
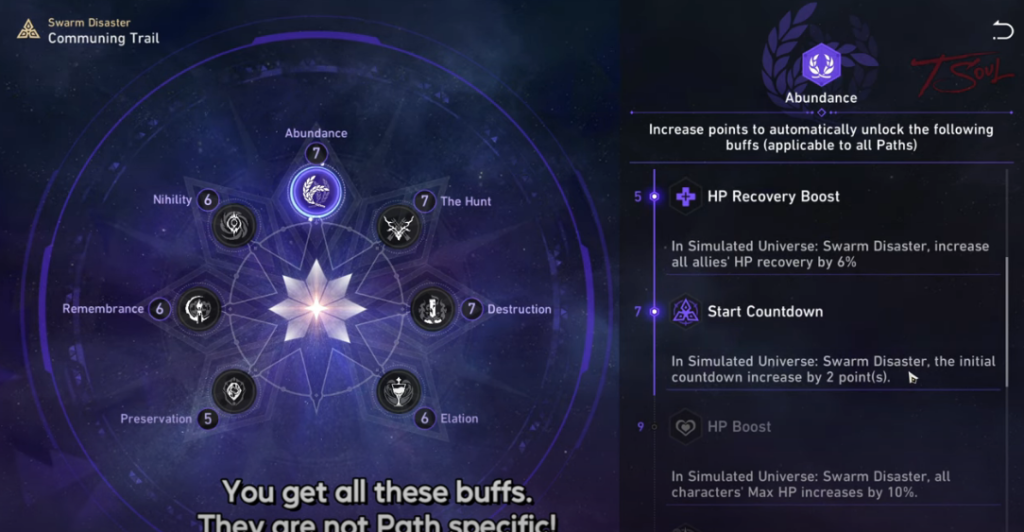
Unlocking Paths and Skill Tree

To unlock the new path, you just need to beat the new simulated swarm on any of the difficulties. And to get the permanent buff or skill tree, you just need to do what these tasks tell you. The first one is to get 720 fragments, and then the next two are to get enhanced blessings and combat notes – pretty self-explanatory on what to do. These unlock points for the specific paths and also some achievements for rewards.
The points are used automatically, and if we go back to this page, we can see what passes we get from each path tree. And here’s the best part – you get all of these buffs no matter which path you pick. That’s right, you don’t need to use elation to get the elation buffs. These will take a while to unlock since the tree is pretty big, so think of it as a long skill tree from the normal sim that needed all those points to unlock eventually.
Best Nodes
Here are some tips for a normal run. There’s tons more events this time around and lots more negative events too, so don’t go making a zigzag path all over the place since not every note is going to be a positive. There’s also this countdown that lowers every time you move a space, and when it becomes negative, the enemies start getting buffed. So time or turn is of the essence.
The nodes I suggest going for are the beacons, which have little symbols on the bottom right, like the sword. They give better or more rewards when clearing. The treasure chest and Gamepad notes are also pretty nice, and they change up the pace. The GamePad notes kind of require you to have deal to get all the rewards for the barrel, but I’m sure you can get lucky enough to hit enough piggies with someone with instant shots like Yukon or Bronia to get both rewards.
My best attempt was one piggy away from getting both rewards without using deal, but if you have this power creep DPS, then he can easily get you max rewards for both the piggy and Pharaoh hunt. You don’t even need to use his technique for the piggies; that’s how good his instant shots are since it’s AOE.
Final Boss Debuffs
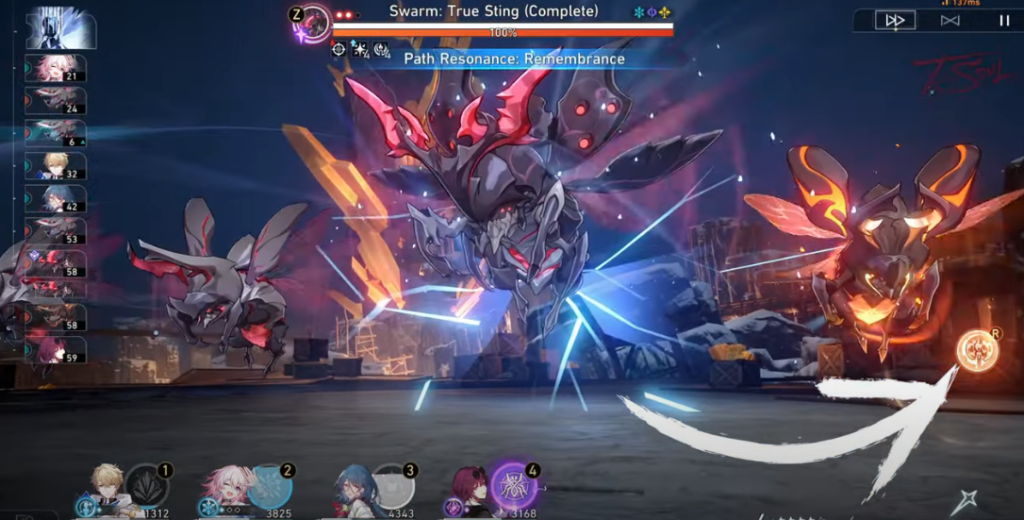
When you reach the boss on the first and second plane, you get a choice of who to fight. Read the descriptions carefully; the first boss lets you add a weakness to the final boss, and the second plane boss adds some debuffs or conditionals. And which path is the strongest? Once again, remembrance is godlike. I said it was strong in the earlier simulated universe, and it’s even stronger now in the Swarm mode.
Best Path?
Here’s some of the new stuff that I got. One of the die effects is to teleport to any recollection or frozen node, and with some luck, you can freeze a node on the far right, letting you skip lots of other nodes and not go into the negative cooldown. When you get to the boss, you can see me here skipping a bunch of notes and beelining it to the right.
And every frozen node you do will give you 25 effect hit rate, which makes it way easier to freeze bosses. And most of our damage is from freezing bosses, then procking these blessings with dissociation. Dissociation damage scales off enemy health, so we can bring in Tank Engine to survive and still dish out a ton of damage just by using auto-attacks against frozen enemies.
Having one or two ice units help freeze the boss faster and more often, but it’s not required if you get lucky with the blessings. And finally, after getting three remembrance blessings, we can get extra benefits from the path resonance. The path resonance is the thing you unlock after getting three blessings to do extra damage that charges up as you do combat stuff.
And in the Swarm mode, the remembrance can mix with hunt and destruction blessings. You can check what paths you can mix with on the second tab here at the bottom. If we also get three hunt blessings, then we can lower the speed of enemies, similar with destruction – we can lower the defense just by getting extra blessings on the side.
Strats for Real Run
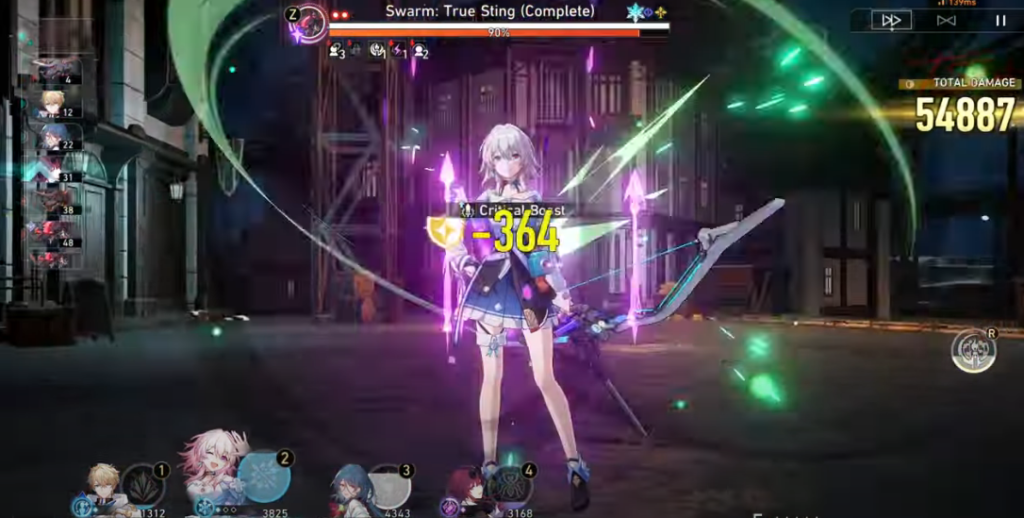
When doing a real run, you need to get a couple blessings, and upgrading them will really help. The required ones are those that increase dissociation damage, which includes fully and melancholia. Even with a bunch of bonus effect hit right, the boss is still pretty resistant to frozen, so you want to use any chance you have to do extra damage.
Dizziness and innocence are also nice to have to improve your dissociation chances and damage. You can improve your chance of getting these blessings by going to the transaction nodes. Screw them as a new vendor, and he sells blessings. They can be expensive, but it could be just what you need to make your run work for your team.
Kill Feed
You want a tank, healer, ice unit to help freeze more, and someone that can do AOE or follow-up attacks to increase the number of times you can hit the boss when it’s frozen. After that, it’s a lot of luck on the proc. Remember, you can just Alt+F4 when fighting the boss to reset the fight; sure, you lose some technique points if you used it, but phase 3 is when it gets annoying.
And if you’re having trouble surviving phase one, then maybe you should level up the skill tree more and come back later. Anyway, hope these tips help with the new simulated universe.